The Quilotoa Loop is a multi-day trek in the highlands, which is fast becoming one of the most popular activities to do on mainland Ecuador. Whilst quite a few blogs talk about it being ‘off the beaten track’ I think those days are firmly in the past. Not that I’m saying you should give it a miss, quite the opposite in fact – it’s becoming popular for a reason.
The base of the trek is commonly the small city of Latacunga. This city has good bus connections from Quito in the north and is on the main road to the south of the country. You do not, however, start your trek directly from here. You get a bus to your chosen start point before spending several day walking from village to village; through rolling hills, alongside gurgling streams and dissecting a patchwork of farmland. When you have reached your end-point, you then get the bus back to Latacunga. So whilst this trek is called the Quilotoa Loop, this is a very loose description of what the hike actually entails.
One of these reasons that this trek is favoured by so many people is the flexibility of the route. The common feature of the different treks is that it includes the beautiful volcanic crater lake of Quilotoa at some point, but apart from that, the direction you walk; the places where you spend the night; the time you spend in each place; and the overall amount of days you spend hiking are up to you to fit into your personal preferences and time restraints.
The trek is also very accessible to anyone who has even a limited experience of hiking. Whilst the altitude can make the ascents a bit more tiring then they should be, if you have a reasonable level of fitness and you have spent time acclimatising to the height above sea level, then you should be able to complete the Quilotoa Loop without too many difficulties. Reasons I believe this are; firstly, that you stay in hostels each night. As well as obviously providing lodging, these hostels prepare all of your meals. So all you are carrying is a day-pack with your clothes and hiking equipment. This makes the trek more accessible to a greater range of hikers. A second reason is that generally, for a normal Quilotoa-Loop-route, the distance covered and time spent hiking each day are not too extensive. This gives you enough time to recover each day. The third reason is that signage on the route has seemingly improved drastically in recent years, so by combining this with the accurate offline map from the Maps.me app, you do not need to be an expert in orienteering to successfully complete this trek. The final reason I think that this is a very accessible multi-day trek is that due to the nature of the walk, going from village to village, you are never too far away from a road and access to transport to take you to the next point. Having this added insurance should provide a bit of confidence for those who are still unsure as to whether to attempt it. Even on our trek, a couple of people we’d met on the first two of days of walking ended up having an issue at home they needed to attend to on the third morning. By the time they were finished they didn’t want to start walking, so they just organised some transport to get to the next point. So, overall, I can see why more and more people are attempting this hike. But please don’t mistake ‘accessible’ for ‘easy’, as it isn’t. You still need an appropriate level of fitness; you need to be acclimatised to the altitude; and you need the right mind set to complete the trek.
A third reason for why this trek is becoming so popular is the price. Ecuador is not as cheap as you might expect and if you factor in probable trips to the Galapagos Islands and the Amazon during your time in this varied country, your wallet may start to weep. The Quilotoa Loop, however, is very reasonable, so may actually help with your budgeting.
So if this has peaked your interest, then please continue on to read about our experiences on the Quilotoa Loop. If you want more information for planning your own trip, then I’d recommend also having a look at the following blog posts. These are the ones I used when planning our trip:
https://www.goatsontheroad.com/quilotoa-loop/
https://www.laidbacktrip.com/posts/hiking-quilotoa-loop-ecuador
As I have just mentioned, there is no one-way to complete the Quilotoa Loop. Especially as it is not actually a loop, not unless you factor in the bus to the start and from the end. We, however, completed a fairly standard route over three days (four overall) and here is what happened:
Contents
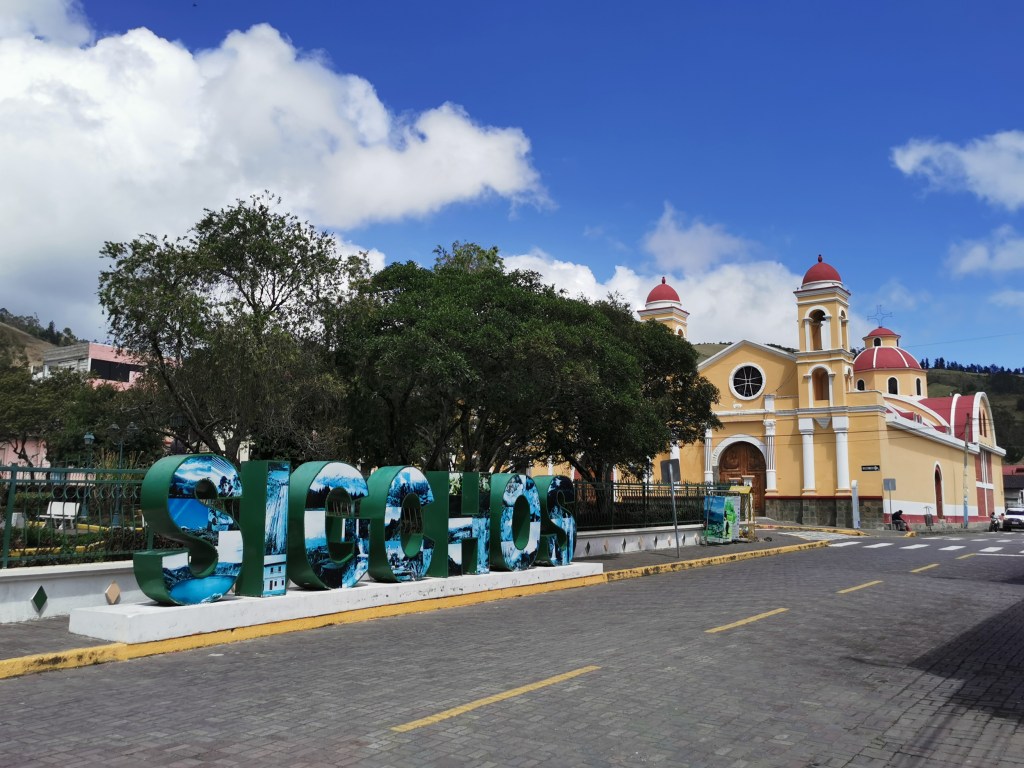
Day 1 – Latacunga –> Sigchos –> Isinlivi
Day 2 – Isinlivi –> Chugchilan
Day 3 – Chugchilan –> Quilotoa
Day 1 – Latacunga –> Sigchos –> Isinlivi
Our trek started, as it does for so many, in the small city of Latacunga. We had spent two nights here and were leaving our main luggage in the storage room of the hostel. This is common practise, given that the main reason for tourists to come to Latacunga is to attempt the Quilotoa Loop or to visit the Cotopaxi National Park. So we caught the earliest bus possible from the terminal to the village of Sigchos. The views from the bus were stunning and got us excited for the hike to come. Whilst it is not common to stay overnight in Sigchos, there are a couple of hostels if you wish to do so. And with hindsight, we may well have done so, more on that in a bit…
After grabbing snacks for the walk and spending some time admiring the pretty square in the middle of the village, we headed towards the start of the walk. It is not signposted for how to get there, so we were relying on the Maps.me app already.
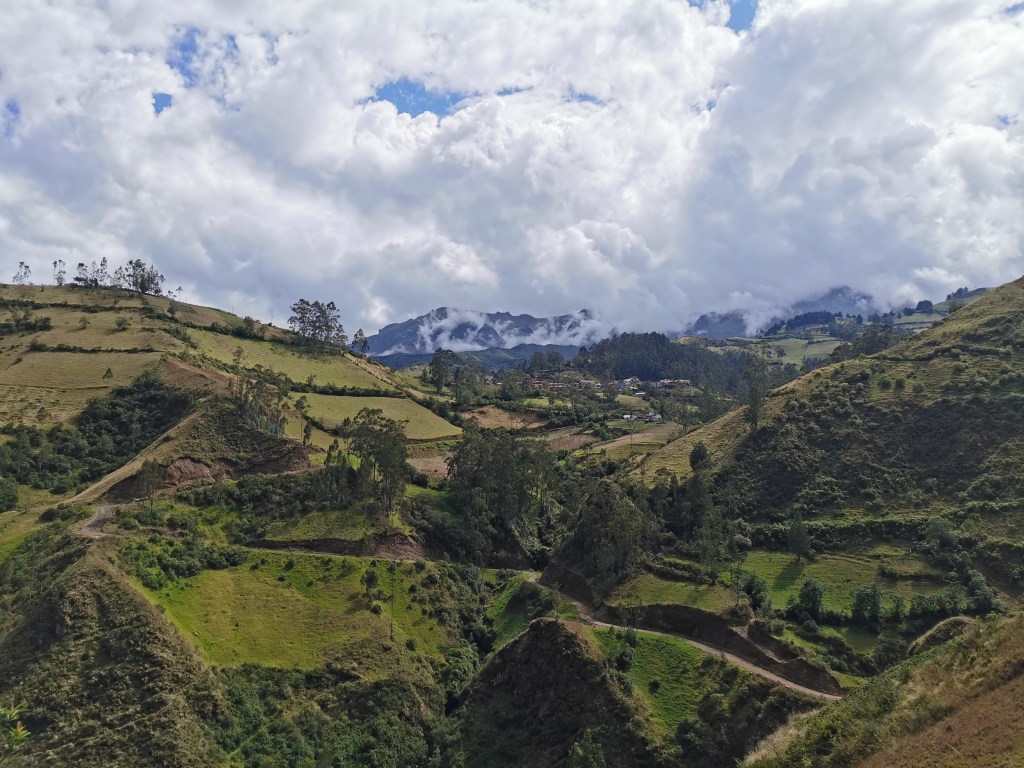
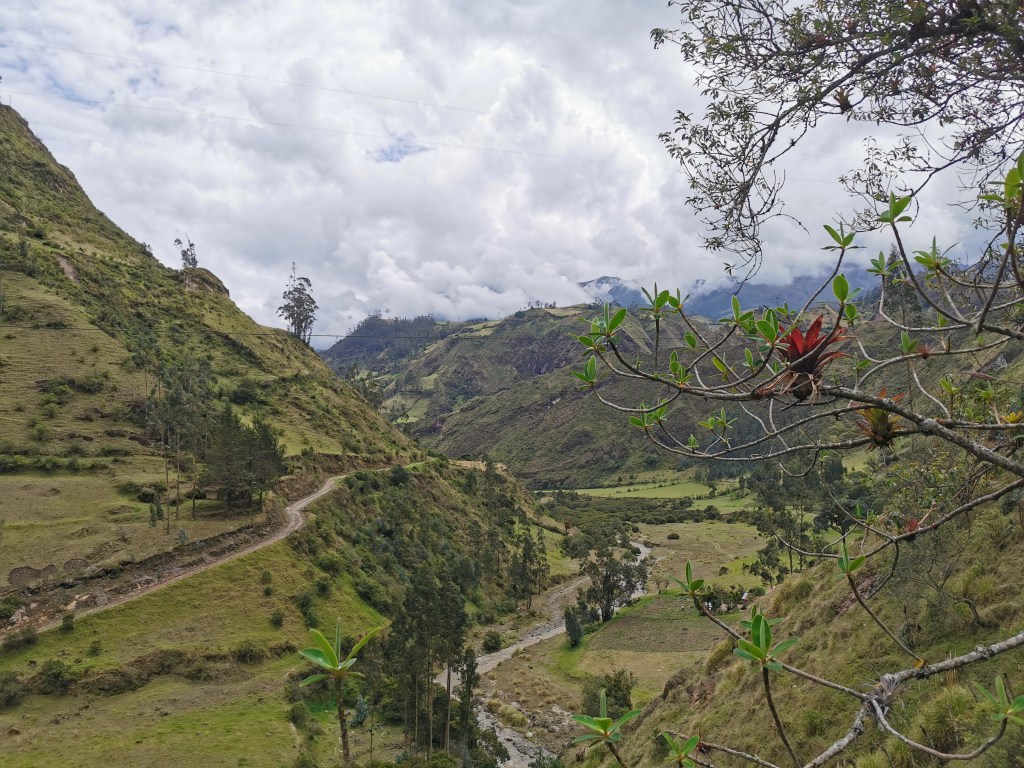
The first part of the trek is pleasant and walks past farms as you get further away from the village. You then get nice views down into the valley before you start the descent. Earlier I mentioned that there are now more signs along the route. These have been put up by hostels to help you get to their lodgings and are extremely helpful. At the point where you need to leave the dirt road and head off down a tiny little track into the valley, however, there is no sign at all. It was by pure chance that we didn’t miss the turning, as I’d stopped to re-tie my boots and Radka happened to check Maps.me. So please be aware of this point to save yourself some time walking back and forth.
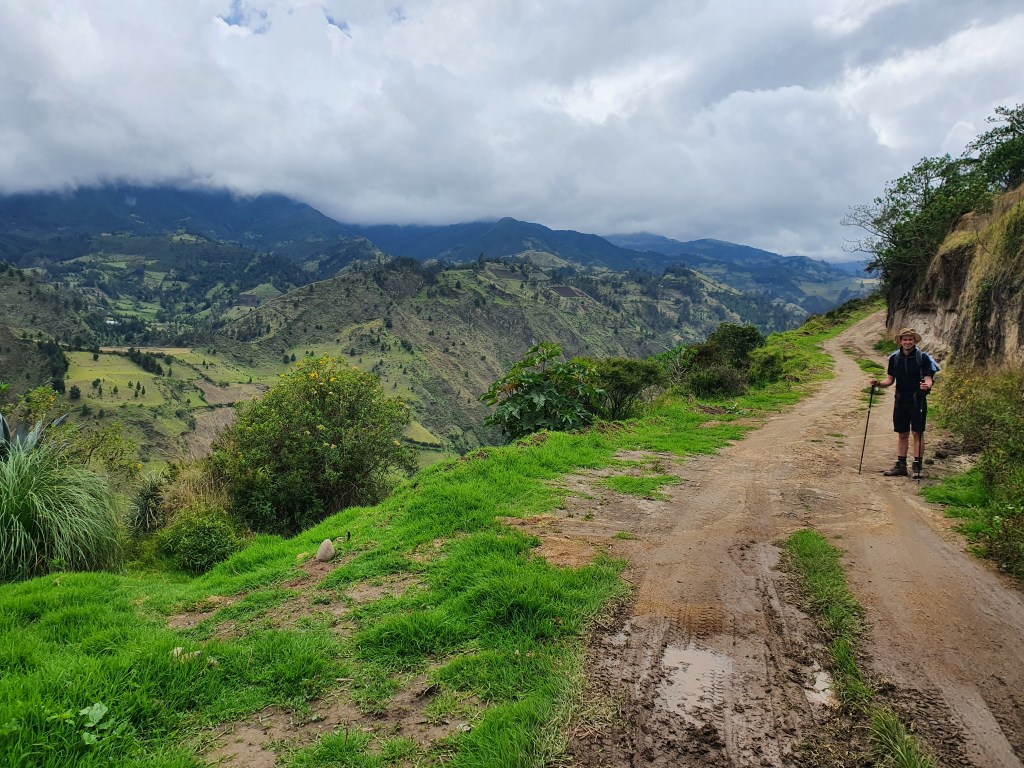
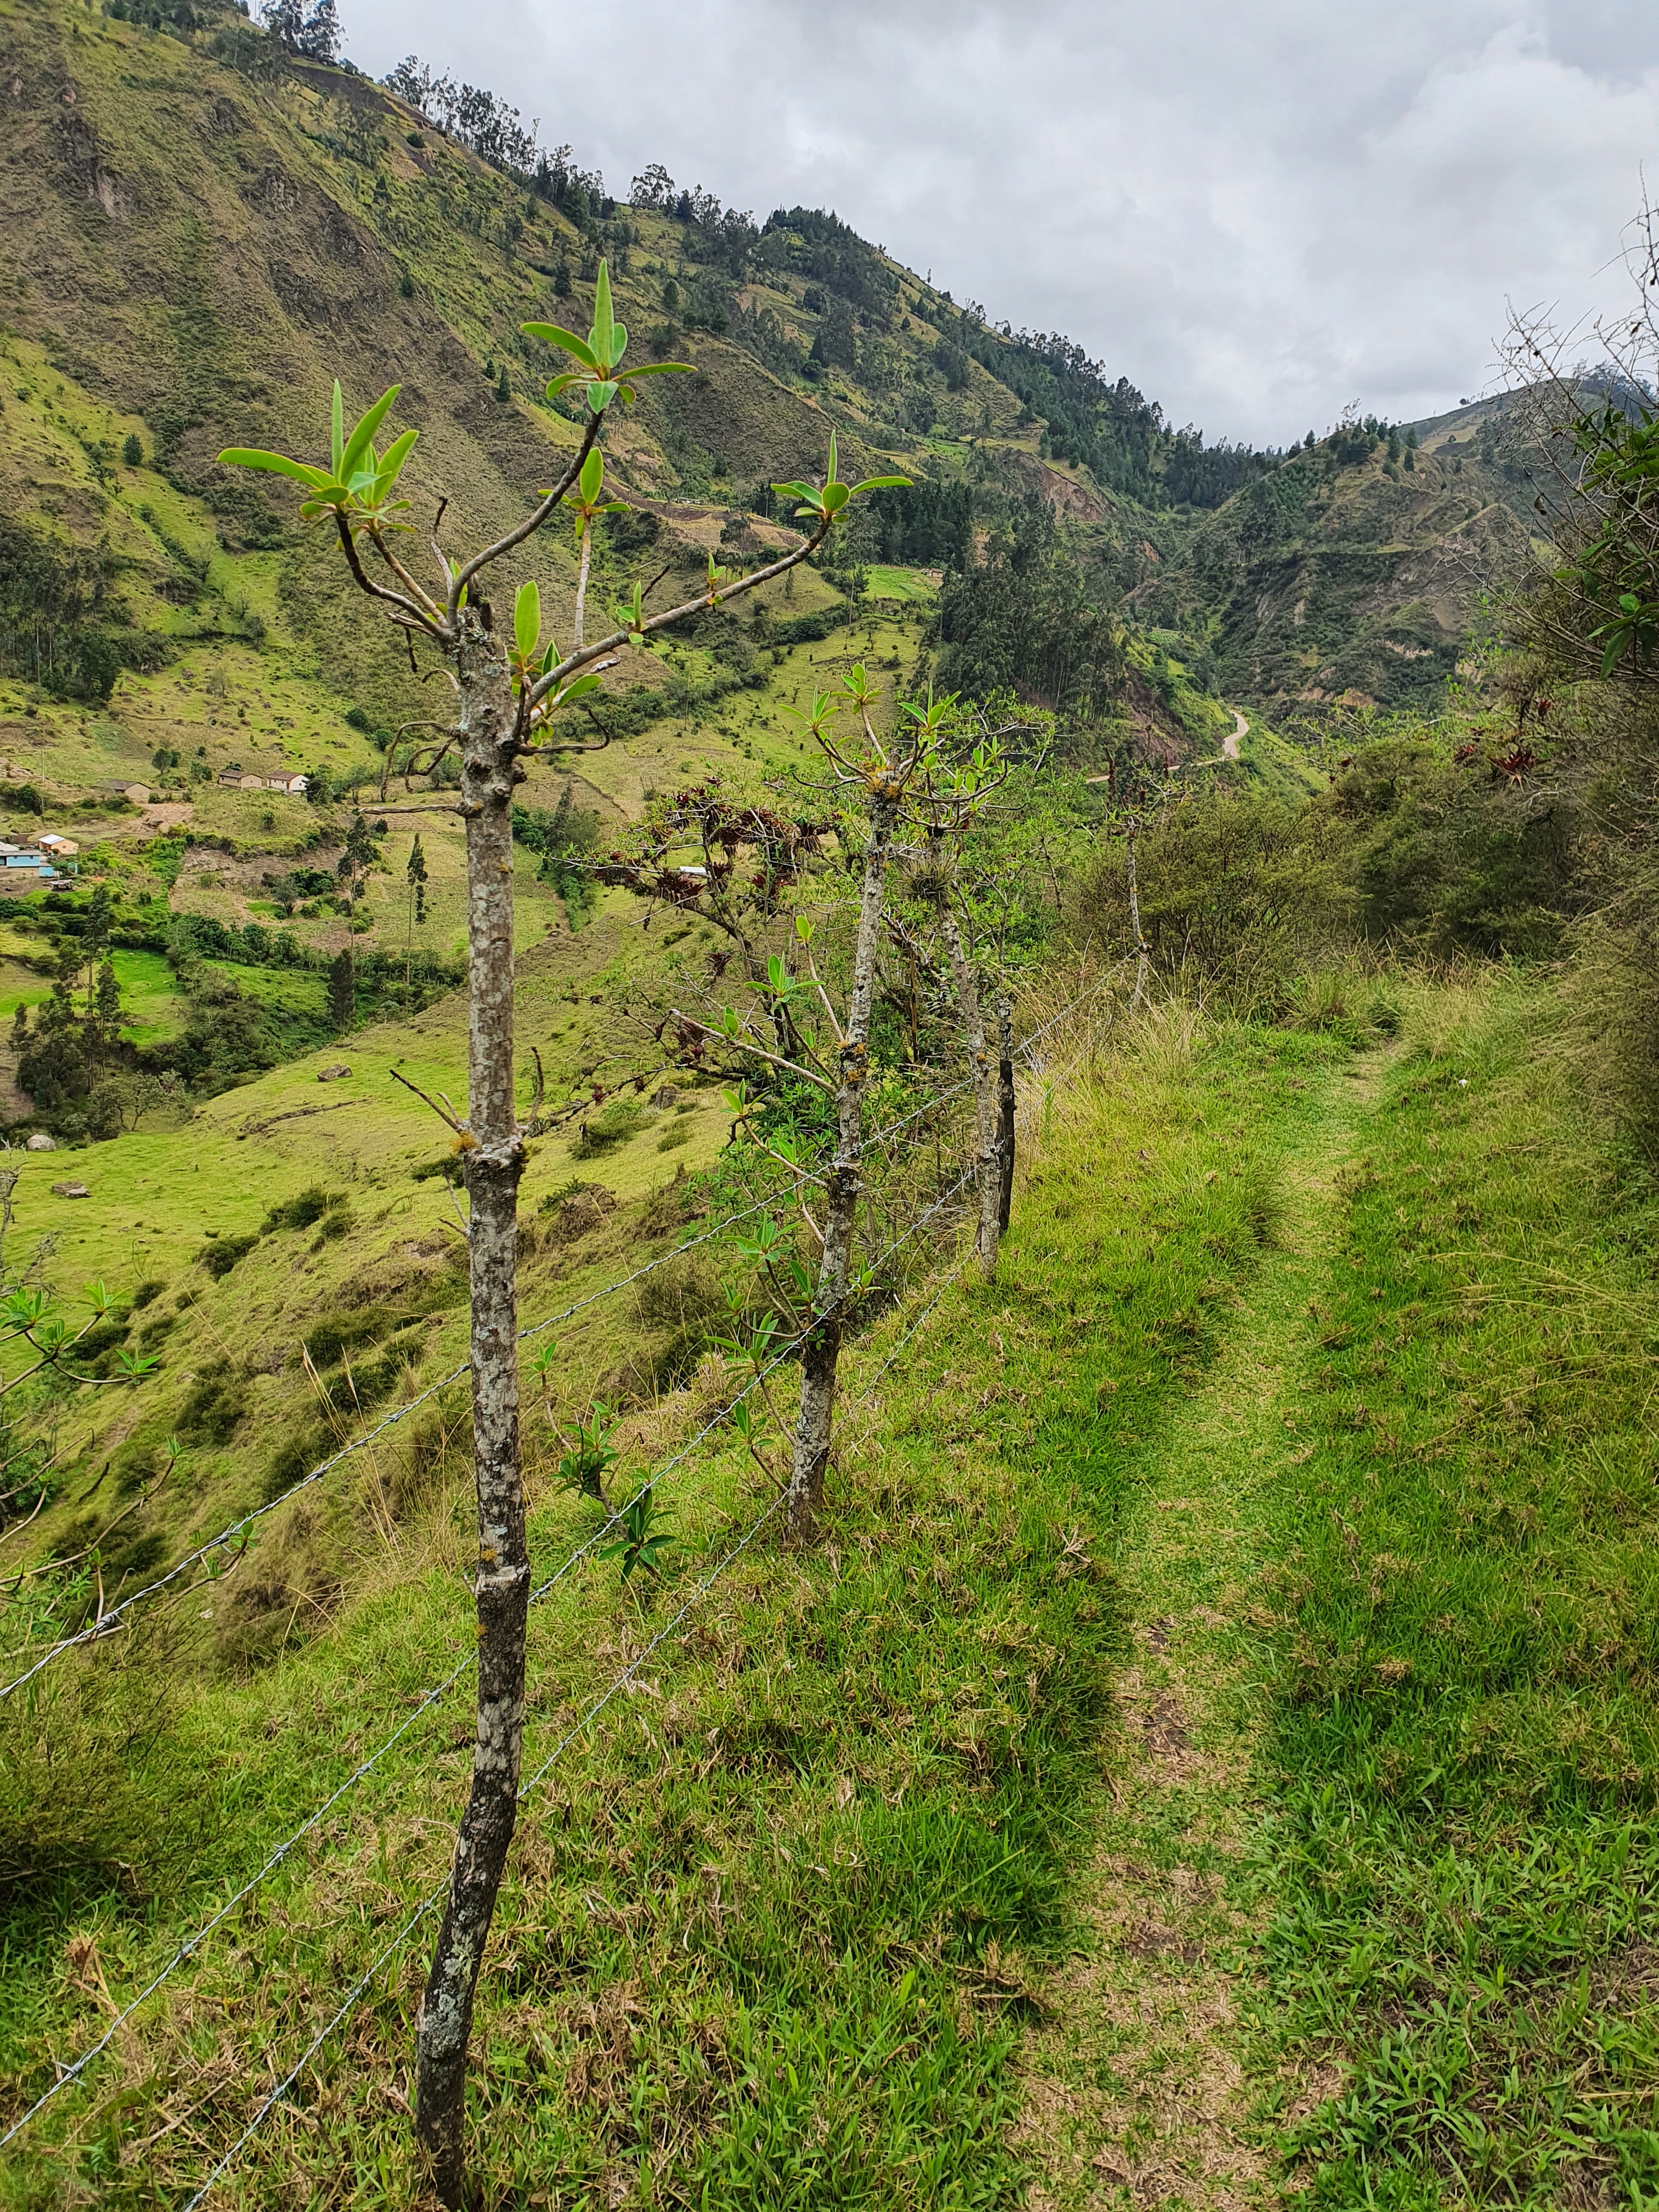
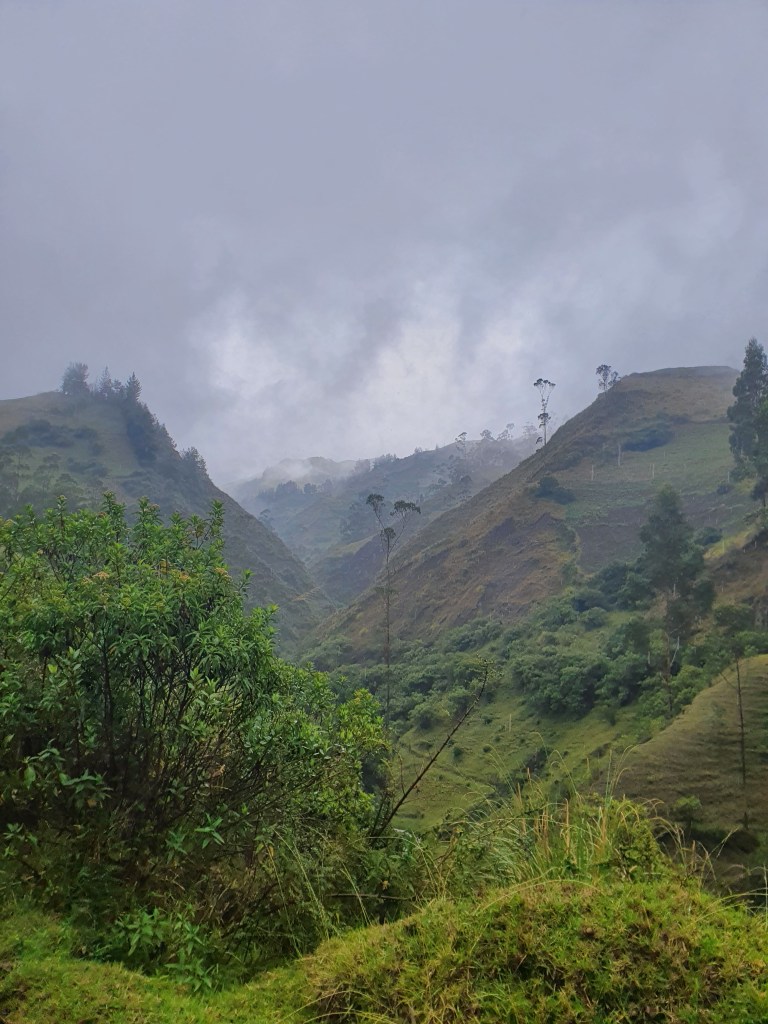
The steep nature of the track means that it doesn’t take too long to get down into the valley. Here you walk along the bottom, near the stream for a few Kms. You pass through more farmland and one thing that we found very interesting was that instead of using normal fence posts, the farmers attached the barbed wire to living trees that they had put there. But the young trees had obviously been cuttings or branches and yet had started growing again. This really added to the natural feel of the area.
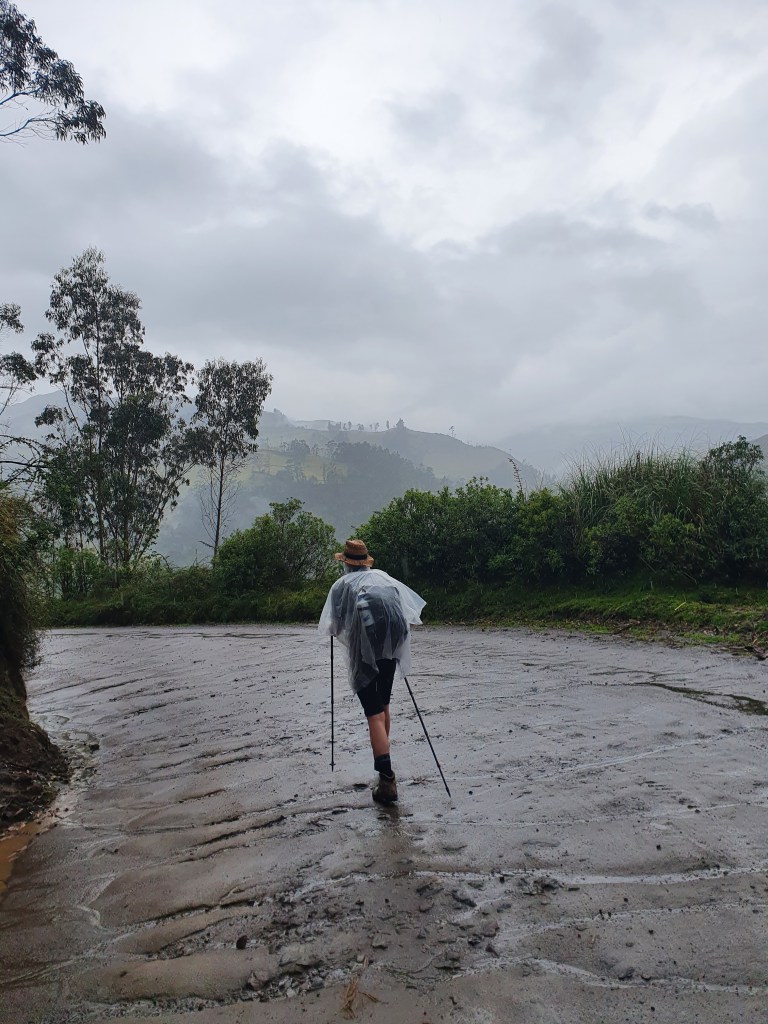
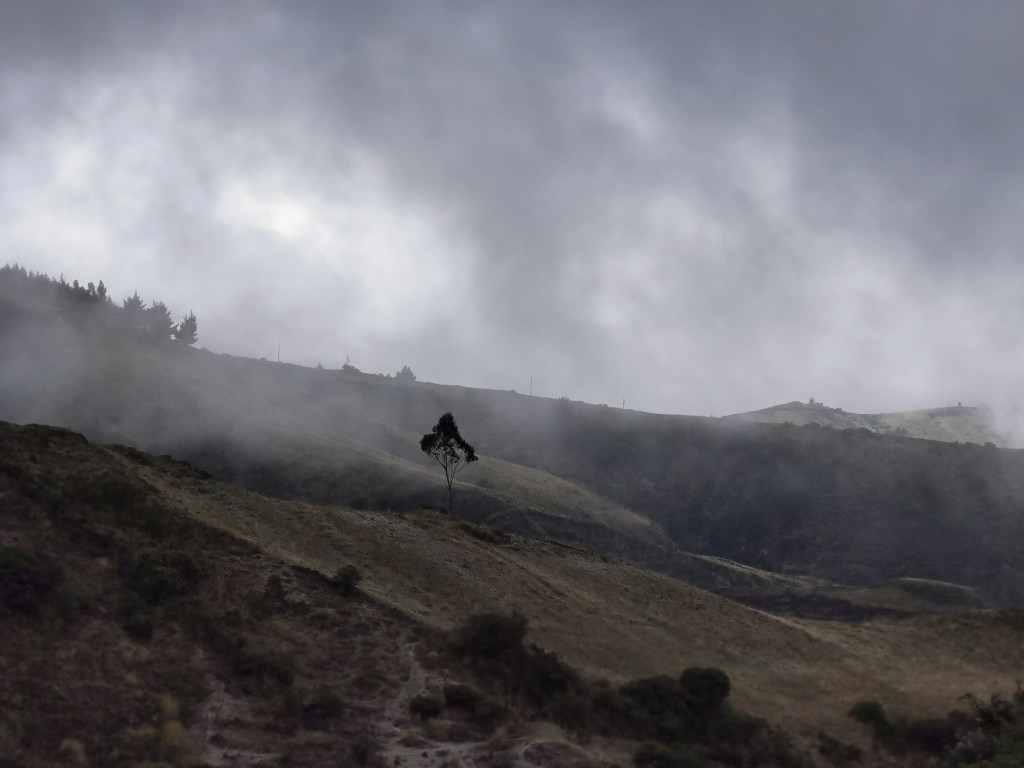
The village of Isinlivi, where we would spend the night, is up on top of the hills, so the last segment of the first day was spent on a long slog upwards. As we began, the clouds continued to roll in and when we were about half way up the heavens opened. And I don’t just mean a light shower, I mean a full-on thunder storm with forked lightning and the rain pelting down. As we hastily pulled on our ponchos and cowered under patchy cover of a small tree we wondered what to do. Hiding under a tree during lightning is not a good idea, but neither is walking along the top of an exposed hillside. And walking back down into the valley wasn’t an attractive option either – there was no where there to shelter and we’d just have to walk back up afterwards. Given that we did not know what to do, we ended up just staying there for quite a while, but when the storm showed no signs of abating we reluctantly carried on up the hill, walking against the small stream that had started hurrying down the path. What made the storm even more disconcerting was its proximity. We could see the lightning striking the hills on the other side of the valley and people we met later in the hostel described how they’d seen lightning in a field adjacent to the village. Fortunately by the time we met the road at the top of the hill, the storm had moved on slightly. It was still raining but not as heavily and the lightning seemed to be getting further away. This should have been the nicest part of the first day of hiking, as you walked along the reasonably flat road with views down and across the valley but unfortunately the clouds blocked most of the views and given how soaked we were, it was rather a miserable trudge towards the hostel. It was at this point that we wondered whether we should have arrived to Sigchos the night before and stayed over. It would have meant we could have started earlier and probably avoided the storm. But hindsight is a wonderful thing and we weren’t to know at exactly what time the rains would come.
Getting to the hostel, having a shower and changing into dry clothes was an amazing feeling. We were even able to go to a neighbouring hostel that had a bar serving throughout the day to get a hot chocolate, a cheese toastie, and then a (well-earned) beer. We then had plenty of time to relax whilst drying our clothes by the fire in the hostel common room, before a simple but filling and tasty meal was made in our hostel in the evening. It was also nice to meet other hikers doing the same thing. A couple were even coming in the opposite direction, so were able to give us a few pointers.
Day 2 – Isinlivi –> Chugchilan
We woke early to a pleasant morning where light clouds and bright blue sky fought for attention above the lush green valleys below. We had breakfast in the common room and collected the packed lunch that the hostels will prepare for you (for an extra fee). Before heading off on the path towards Chugchillan, however, we wished to see some of what we had missed the day before. Above Isinlivi is a viewpoint overlooking the valleys that we had walked through the previous day. We spent about an hour walking up there, admiring the views and heading back to the hostel. For us, it was definitely worth the effort but if you had had nice weather on the first day of hiking, then it would have been very similar views and maybe you could give it a miss.
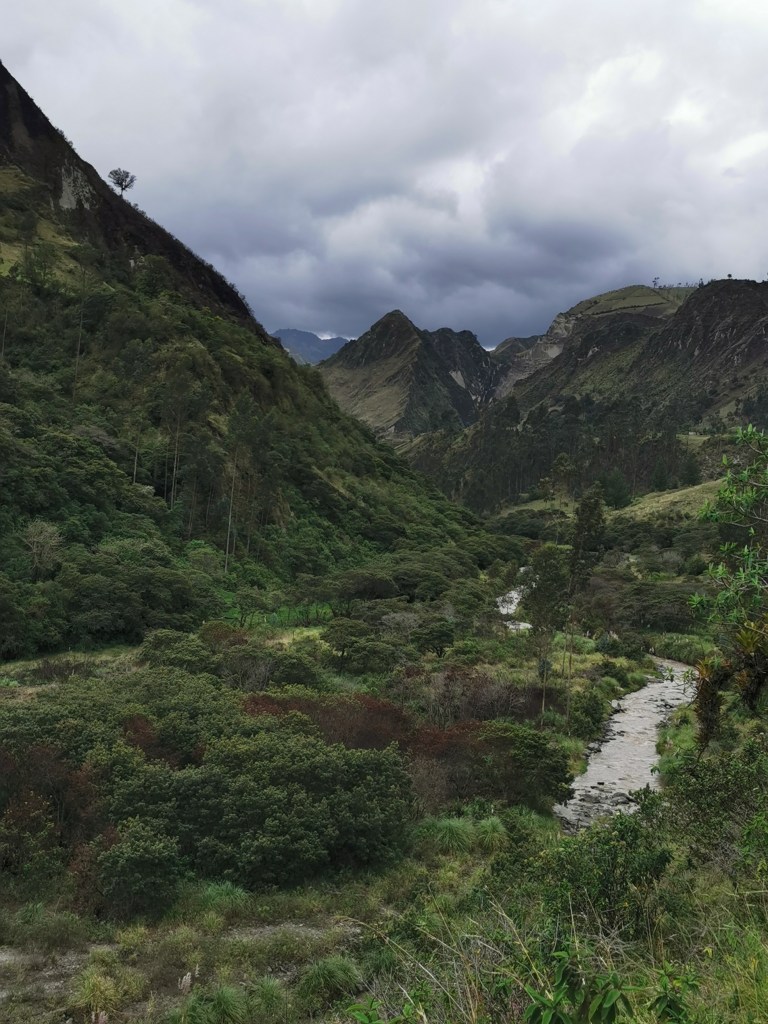
After returning to the hostel, we then proceeded on the path that led behind the buildings and started the next part of the trek as it wound it’s way down into the valley. This first part of the walk is very picturesque and seemed ‘more green’ than other parts of the hike. The signs took us over a little bridge before starting up the other side. It was around this point that we unwittingly left the trail suggested by Maps.me. Overall, it doesn’t really matter, as they meet up before too long, but it turns out that the Maps.me route is a bit quicker, as two people who started behind us suddenly ended up ahead later on without having ever passed us. After this point, you make your way through the upper parts of the hills. This is probably the nicest part of the second days trek.
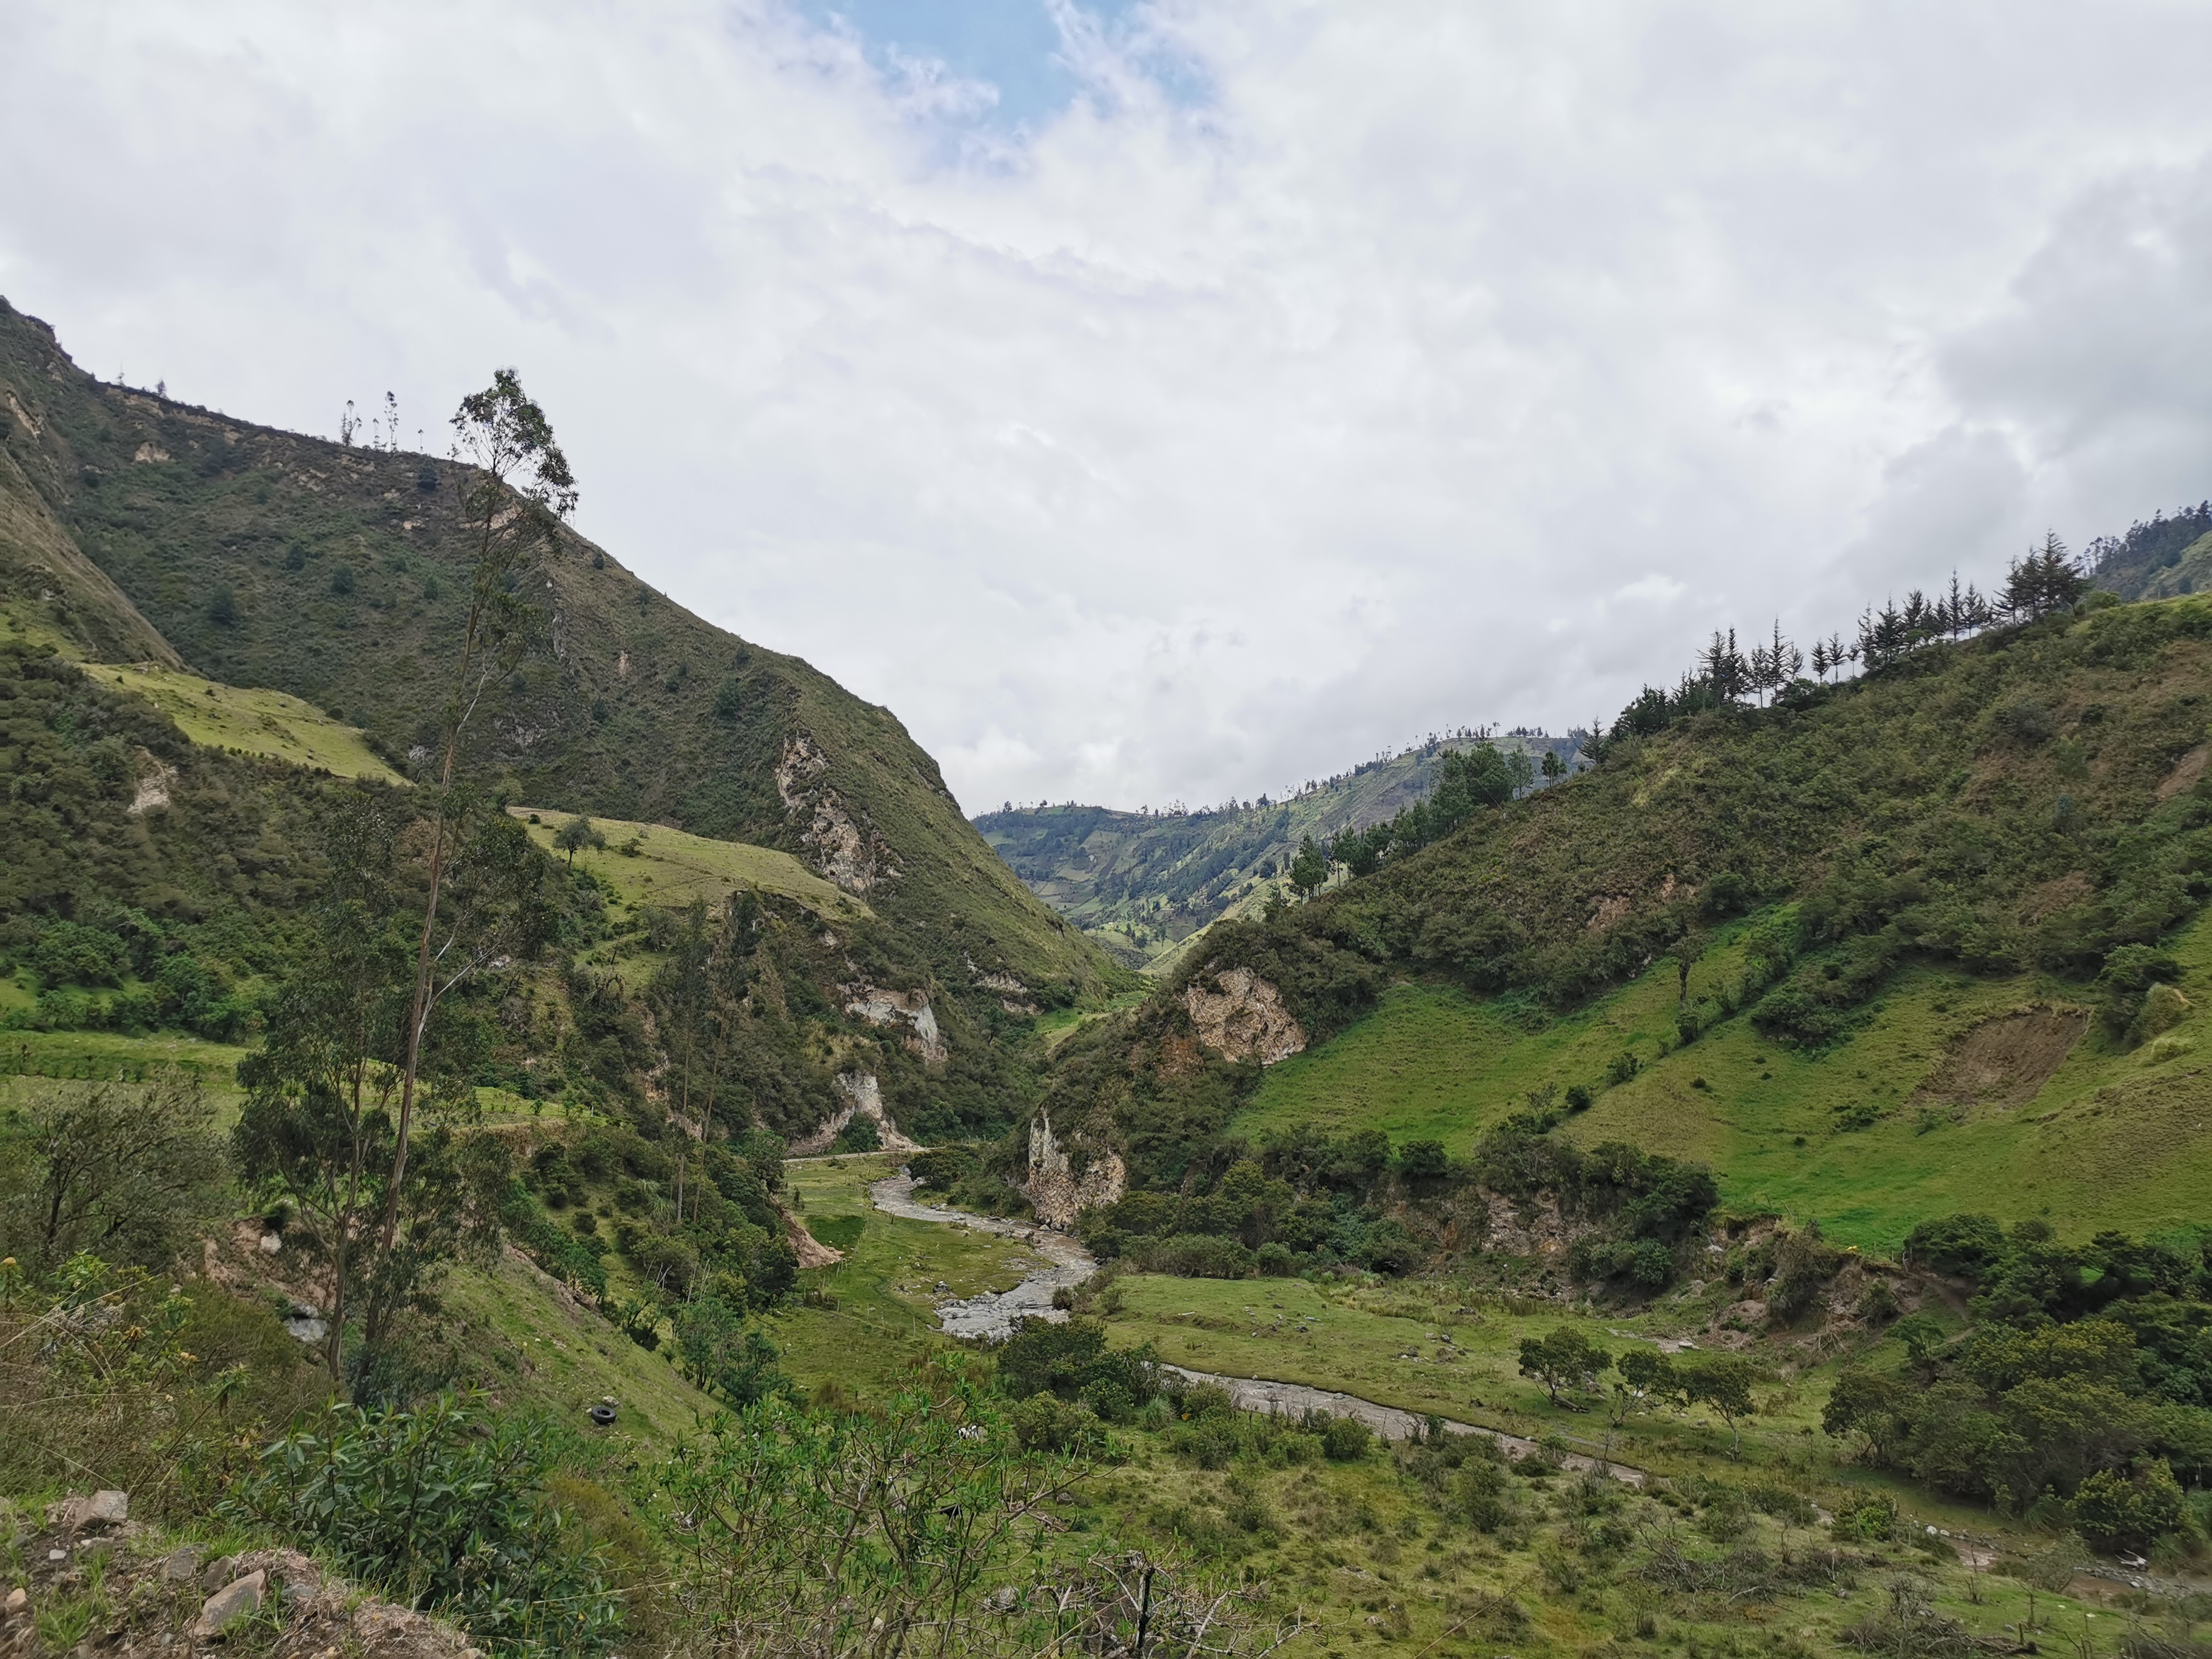
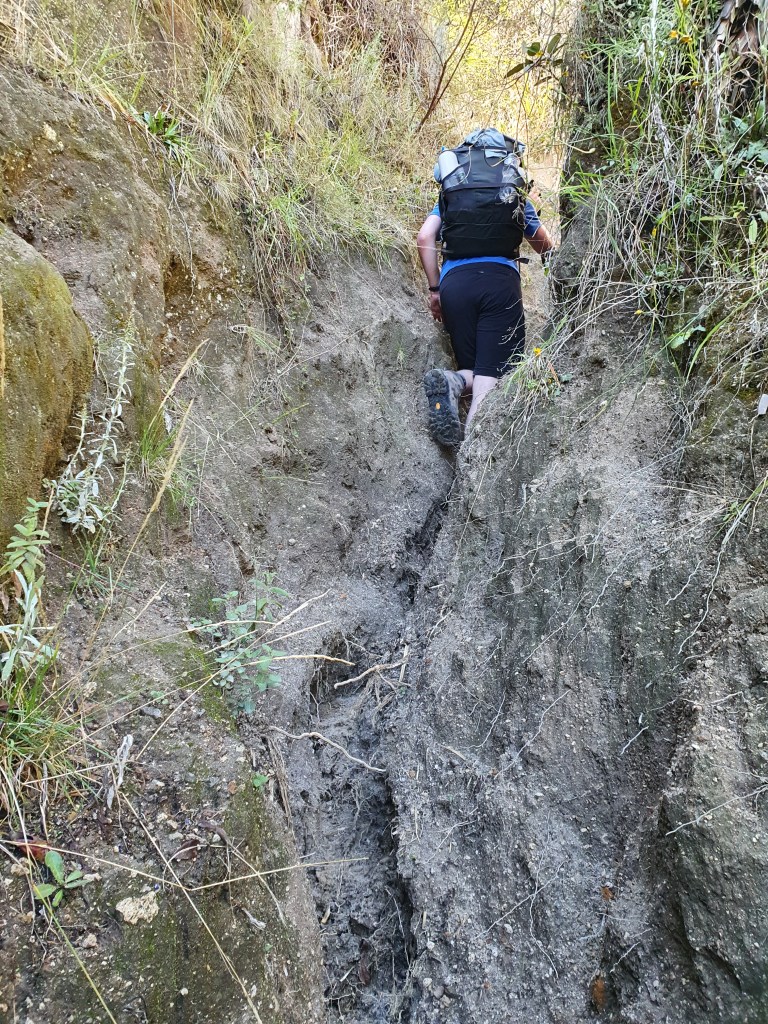
After a while you get to the only tricky part of the walking for the day. You need to descend a lot further into the valley and to do this, you need to walk down a very steep narrow path. And when I say narrow, I’m not referring to the overall pathway. Whether due to footfall or water erosion, I’m not sure, but there is a crevice in the soil that made it quite difficult to actually be able to walk down. It’s quite hard to describe it here but if you end up doing the hike you’ll see what I mean! Anyway, you eventually get down and then follow the path for a while longer until you get to the level of the river. At this point you need to cross a log that is acting as a bridge. It can be quite slippery when wet, so be careful and go at an appropriate pace.

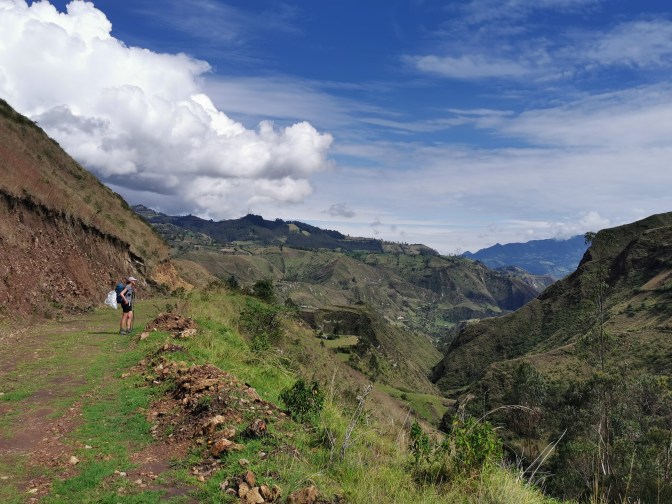
After traversing the stream, we headed along the valley, getting progressively higher again until we reached a small village. It was nice to have the views from inside the valley, as it gave a different perspective to what we had experienced for most of the morning until that point. At the village you need to walk up the side of the hill using a series of vicious switch-backs that left us exhausted and gasping for breath. The views down the valley would have been impressive except that the clouds were starting to roll in and by the time we got to the top of the hill, we could feel the first spots of rain falling down.
After our experience the previous day these first few drops made us quickly put on our ponchos and we were right to do so, near the top of the switch-backs there are a few houses and as we passed through them the rain came pounding down. It didn’t take too long before we reached a main road. At this point you need to follow the road until you reach the village of Chugchilan, which houses the hostels. In my mind this was the last part of the walk and we’d soon be there. In reality, it was still a few kilometres further on so it took quite a while. And when you’ve been walking for quite a while with your pack hanging heavily on your shoulders and the rain bouncing off the tarmac, the boredom of walking on a road intensifies the feeling of being completely fed-up. This was easily one of the worst parts of the whole trek – so if you are doing the walk, remember that there is a long stretch on the road at the end of this day, as it will actually make it psychologically easier to carry on.
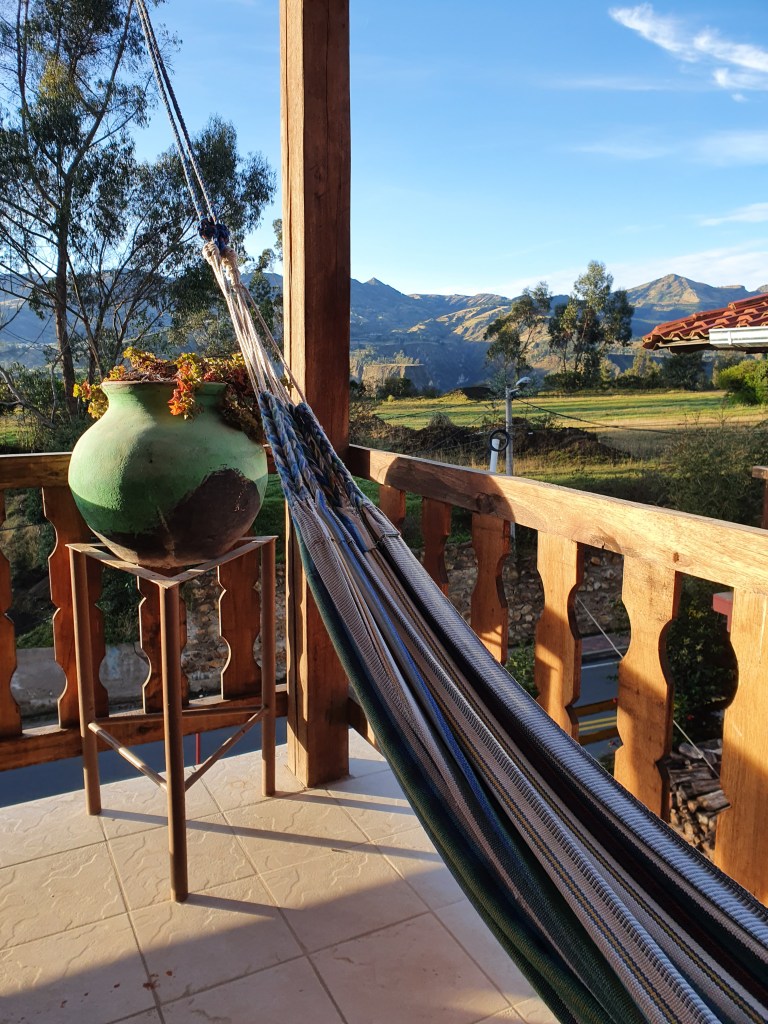
Just as it had been the previous day, reaching the hostel was such a nice feeling. The rest of the afternoon was spend relaxing and trying to get our clothes and boots to dry, before enjoying a meal in the evening. The cloud and rain meant we couldn’t take full advantage of the hammocks provided but the comfy beds were more than enough.
Day 3 – Chugchilan –> Quilotoa
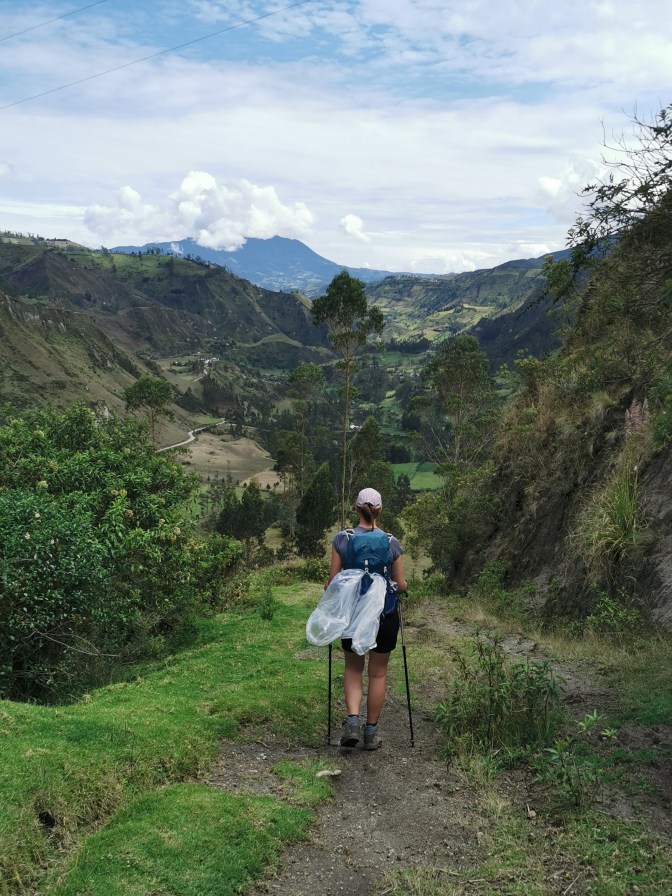
Our last day of hiking started with beautiful blue skies and views that had been completely hidden the day before when we had arrived.
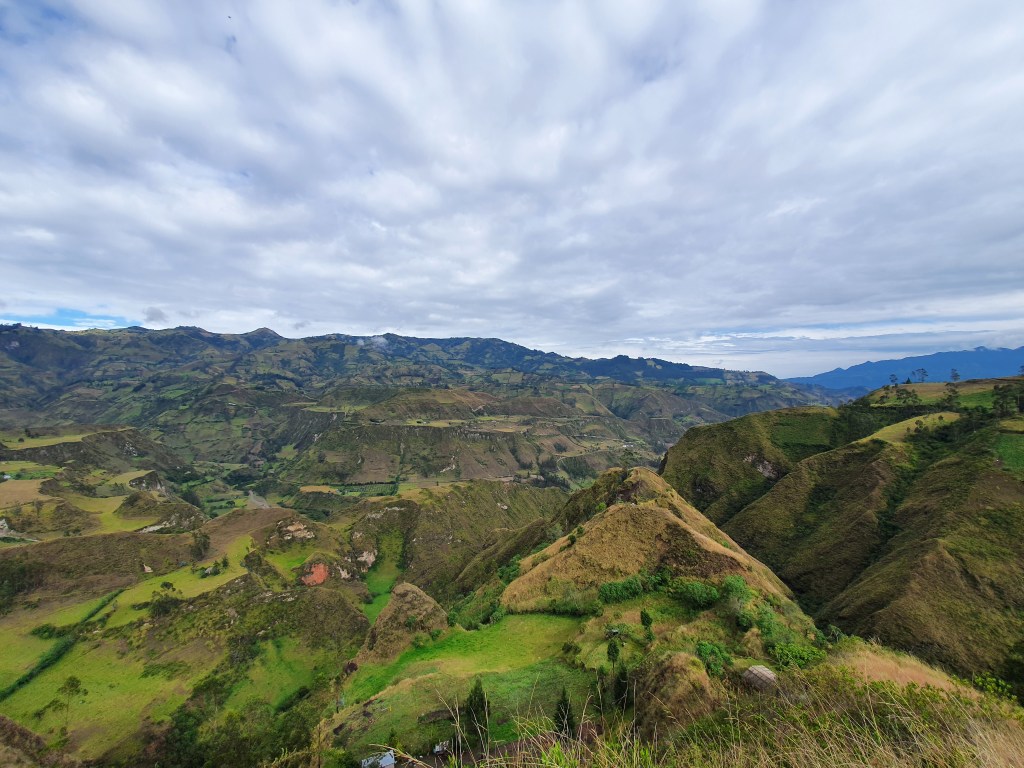
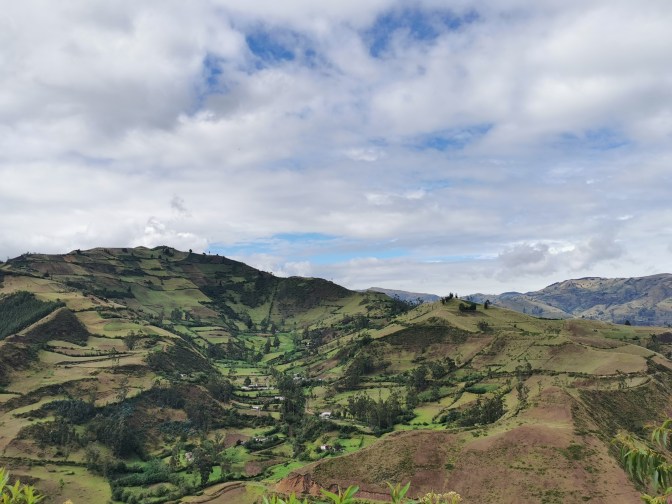
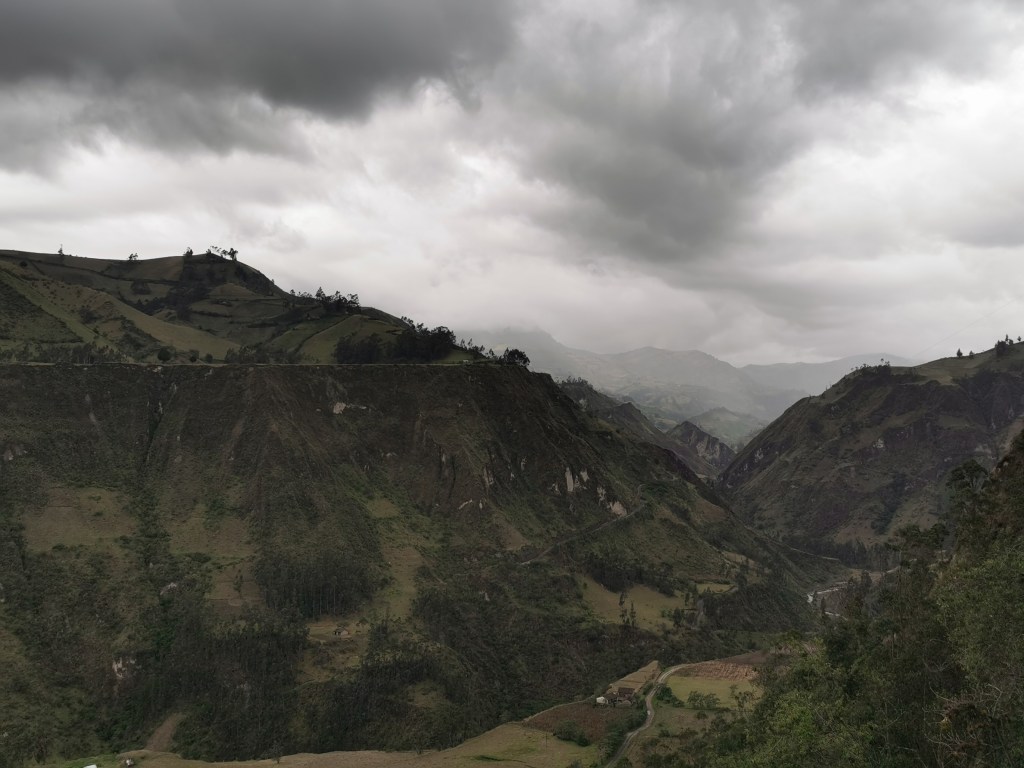
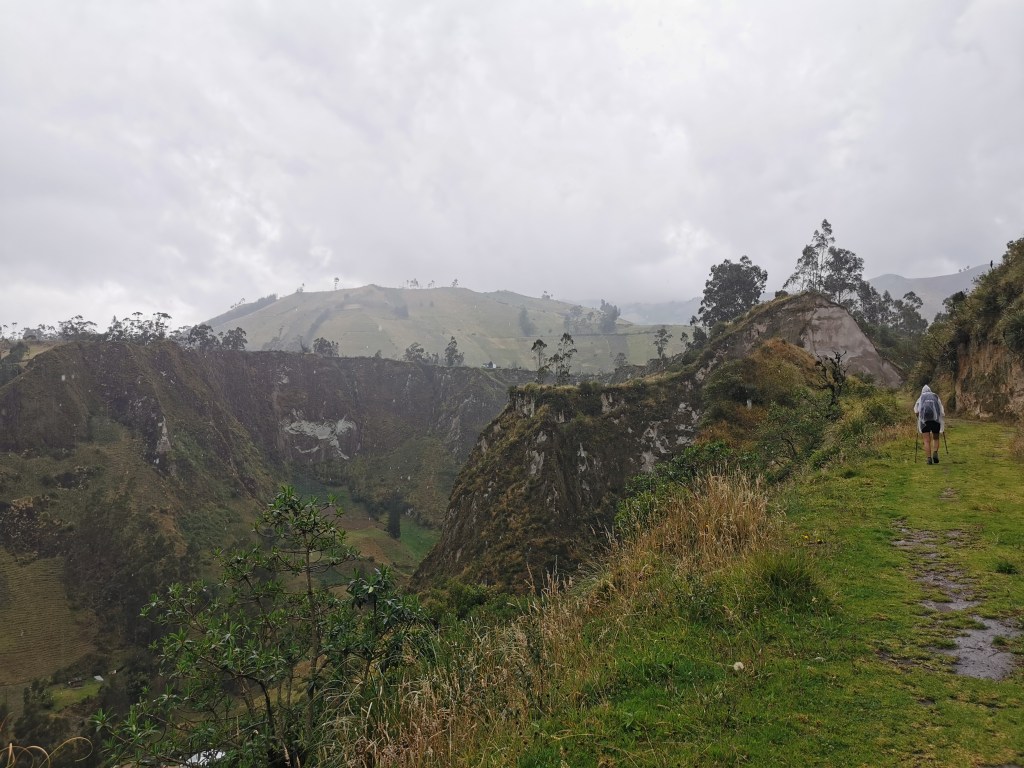
The first part of the hike required us to walk a bit further along the road until we reached the turnoff, not long after the main square of the village. After this we were treated to amazing views out over the valleys. We were also very intrigued about the shape of the hills. Many of the tops seemed very flat and we were wondering if they were ‘man-made’ to an extent, possibly to make farming or building easier. But other ‘flat tops’ still seemed to be natural on top so maybe it was just some quirk of nature. If anyone actually knows I’d be interested to learn about it, so please leave a comment below.
The trail carries on among the rolling hills, and you gradually get lower until you reach a certain point. Now, when we had been at the hostel the night before we had been warned about a change to the route. There are actually two normal paths (three if you count the road) that take you to the same place on the route. We had been told that one of these paths was now not passable due to problems caused by the recent heavy rainfall. But the second path should still have been okay, so we made our way towards it. Oh how we wish we’d just used the road…
The path heading up the side of the hill seemed fine to begin with and provided some nice views back down the valley we’d just walked through. But then it starts to get trickier and trickier. The main problem was the ground itself. It seemed that the heavy rain had caused the soil to turn to mud but that this mud had then dried in the sun. This process had obviously repeated over many days and the result was that instead of having firm ground to walk on, it had become soft and flakey. Water erosion had also caused the bottom of the path to be a narrow crevice in the centre of the pathway. This is, again, quite tricky to describe on here but given that the path was very narrow, it meant that you could only walk on certain places and quite often these spots would crumble away when you put any sort of weight on them. We often had to make large steps to climb the steep slope and the added pressure would cause large chunks of he path to simply break away. We each had one big fall, with mine causing me to end up flat on my back with my backpack wedged into the crevice, leaving me like an upside-down turtle. Radka obviously, like any other loving partner, reacted to this situation by killing herself laughing and stopping to take a photo…

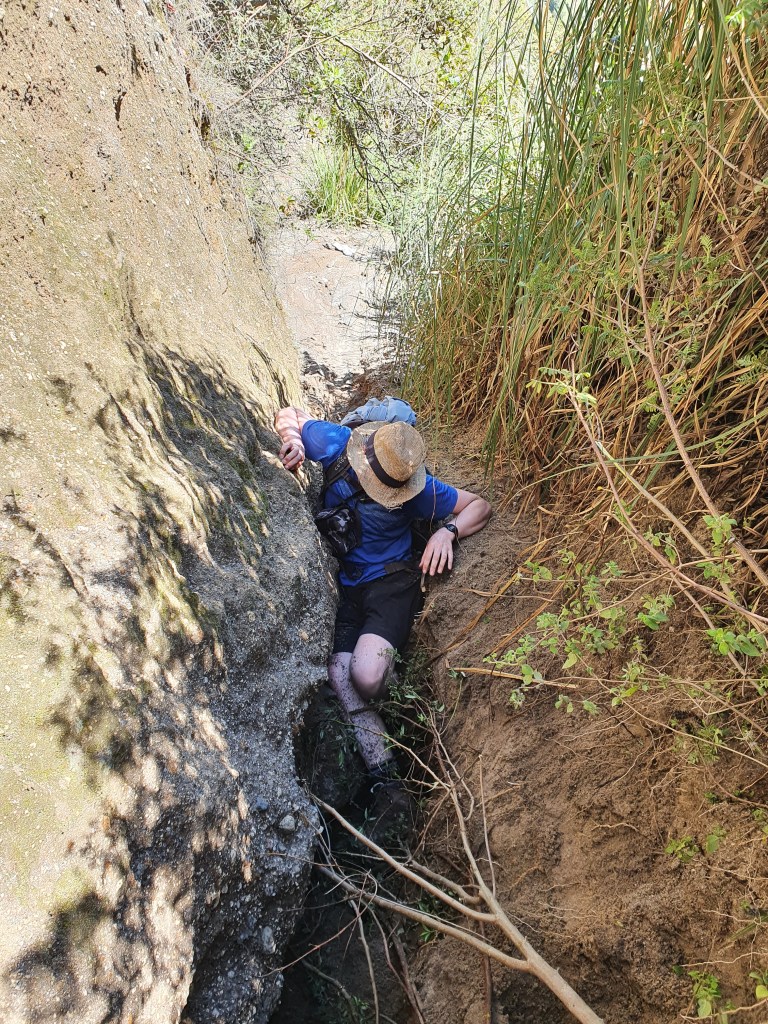
Unfortunately, this wasn’t even the worst part. A bit higher up, after we thought we were passed the worst of it, a big section of the path had previously broken away. This meant that we were literally having to climb up the slide to be able to get back on the path. Luckily, Radka is quite nimble so was able to make it up but I was having real trouble accessing the foot holds in my hiking boots and wouldn’t have made it up without the assistance she provided. What made it even harder was that the grass that she pulled herself up by was really sharp and led to even more cuts and scrapes. So overall, this reasonably short ascent took us two or three times the amount of time we would have expected, plus, once we reached the top, we spent a further thirty minutes resting whilst cleaning and disinfecting the multiple cuts and scrapes we had over our arms and legs. So this part of the hike had been an absolute disaster! We don’t know what this path would be like under normal circumstances, but we wished we had just taken the road up to the hamlet La Moya instead.
We then carried on through the farmland and hills until we could see the small village of Guayama Grande on the other side of a steep valley. The path descended into the valley until you are able to cross the river. But by this point the clouds were already rolling in and by the time we reached the small village we could already feel the rain on the air. This village was also the first place where we had the small children expecting us to give them money or chocolate. It was really disappointing to see tiny children, who were barely walking, automatically holding out their hands when they saw us.
From Guayama Grande, it is the start of the slog up the volcanic crater and it wasn’t long before the heavens opened again. This time, however, because we were higher up, instead of just heavy rain we had to deal with hailstones. My poncho, as is normal, didn’t have any sleeves so I ended up tucking my arms inside rather than exposing my bare skin. It seemed to last forever but by the time we were getting near to the crater rim it had reverted back to ‘just’ rain.
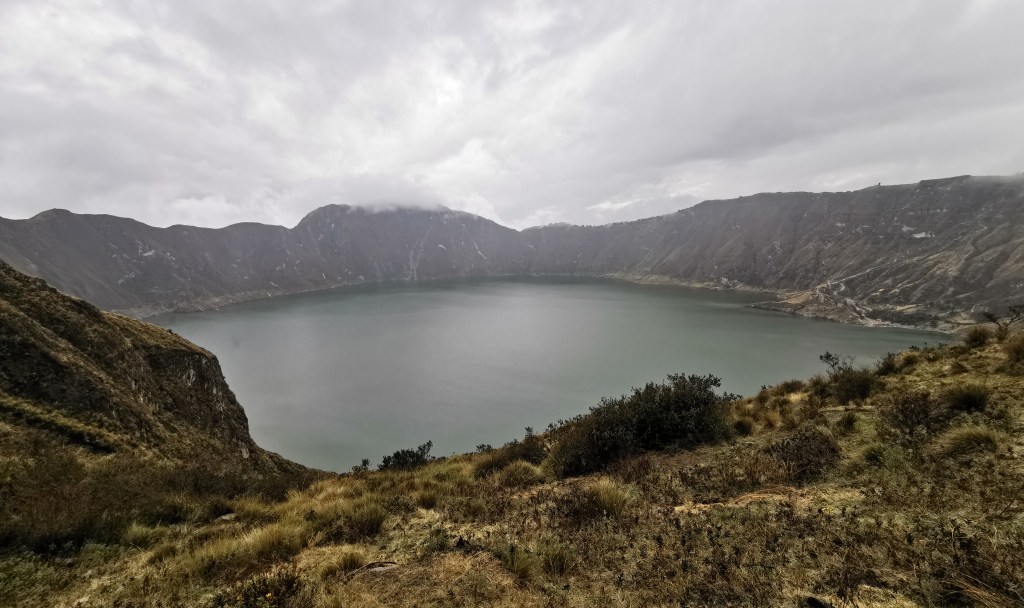
Whilst not quite the end of the trek, reaching the crater rim is supposed to be the pinnacle of the hike, the part that you were aiming for. To say that it was an anticlimax for us is an understatement. The rain was still falling and was now accompanied by low rumbles of thunder, plus cloud was partially obscuring the crater and the dull looking lake below. We were mightily disappointed.

As I mentioned, this isn’t actually the end of the trek. The village of Quilotoa, where we’d be staying the night, was on the other side of the crater rim. At this point we had a choice. The proper path led round on top of the crater rim. To get onto it you needed to follow a path that looked steep and slippery. Another option, at least according to Maps.me, was to take another smaller path, which descended half way into the crater and carried around before heading back up to join with the major path. We were bit worried about being exposed on top of the crater due to the threat of lightning so decided to risk taking the path into the crater.
I’m still till this day unsure about whether this was a wise choice or not. The path was narrow and untended with parts having steep slopes falling away from it. The rain had also made some parts slippery but by the time we were starting to question it, we were not wanting to have to head back up, so we continued onwards. I don’t know if it would have been the same from the top or not but as we continued the clouds seemed to lessen and, for a time, we actually had better views across the lake and started to see what all of the fuss was about.
After passing the halfway point we were intercepted by a boy coming the other way. He tried to persuade us that the trail was dangerous and was only used for animals and that he could show us the way out. Whilst not saying it specifically, it was obvious that this was for a fee. He seemed quite annoyed and disconcerted when we insisted that we were okay and that we were happy following our map. After this we did actually briefly go the wrong way but when the path suddenly disappeared we realised our mistake and retraced our steps until we would the right way again.
Our trail did eventually make its way back up to the crater rim, where it met up again with the main path. By this point the main path was wide and well-maintained so it did make us wonder as to whether we’d made the correct choice or whether we should have continued with the designated route. But then again, we don’t know the condition of the path all the way along the rim and thus don’t know how long the initial narrow, tricky-looking path that we saw would have carried on for. So we really don’t know whether to recommend the pathway we took or not. All we can say is that there is a path that goes through the crater and connects with the main path on the other side. It has some nice views along the way and it provided us with some cover from the elements. But it definitely required more descent and ascent and it’s likely that overall it is a trickier path than the recommended route (although we don’t know for sure).
The main path carried on until we finally reached the village of Quilotoa. At the time the overriding emotion was one of relief, we were so glad it was over. But I’m confident that this was mainly due to the rubbish weather we’d experienced. Once we got to our hostel and into some dry clothes, we started becoming happier at having completed the challenge. The weather didn’t improve that evening so we didn’t explore the village until the following day…
Day 4 – Quilotoa –> Latacunga
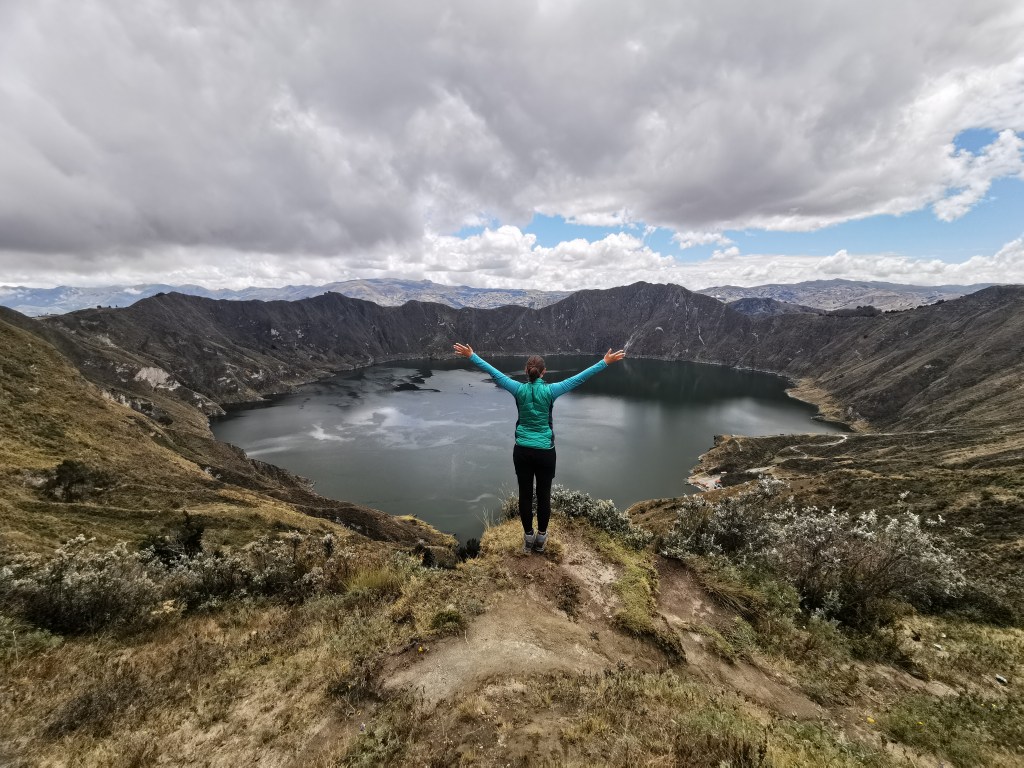
Our fourth day didn’t involve any hiking but I still thought I should include it as it completes the ‘loop’. After having breakfast in the hostel we went for a little walk through the village. Quilotoa village sits right on the crater rim and thus a couple of minutes from our hostel is the view of the lake. Whilst still not brilliant blue skies, the weather was still magnitudes better than what we had experienced the previous day. Thus we were finally able to see the colourful waters down below us. It just wasn’t the colour we were expecting. In pictures we’d seen of the lake it had been a stunning alpine blue but what greeted us was very green. Apparently the overhead weather and the amount of rainfall has a massive affect on what colour the lake looks. We had just caught it on a green day. This didn’t detract from the experience, if anything it made it more different and interesting.
After taking in the views from the village we set off with a vague idea of checking out what the main path was like that we had decided not to walk on the day before. But we hadn’t gotten too much further than when we had reconnected the previous day when we gave up on the idea and simply found a spot to sit and enjoy the view. After all, it is one of the main reasons we’d wanted to do the trek in the first place.


After returning to the hostel to collect our bags, we went off in search of the bus, which can be found on the outskirts of the village on the main (only) road. We knew how long the bus should take and we’d worked it out so that we should still have plenty of time to collect our luggage in Latacunga before getting another bus towards our next destination of Banos. What we hadn’t factored in, however, was that our bus stopped in a village twenty minutes from Quilotoa and then proceeded to wait there for over an hour. There was then more delays once we eventually set off and thus by the time we eventually arrived in Latacunga we had to run to our hostel to get our luggage before getting a taxi back to the station. Even then we only caught the last bus by the skin of our teeth. So the moral here is to make sure you give yourself a lot more time than you need on your journey back.
Overall thoughts
Well done if you’ve managed to make it to the end of this post, as there’s been a lot to get through. I just thought I’d leave you with a brief overview of our thoughts having completed the Quilotoa Loop.
Good points:
- Easy to organise.
- Pretty cheap.
- Nice to only walk with basically a day-pack.
- Generally a good path.
- Some beautiful scenery.
- Nice hostels providing good hiking food.
Not-so-good points:
- The weather – this is partly bad luck and partly our fault for going at the beginning of the rainy season.
- In terms of scenery, this is not your general trek in the mountains so don’t expect the scenery to match something like the Inca trail. It is more farmland and sloping hillsides.
- We had some misfortune with the paths – make sure you always check with the hostels about any closed routes.
- The hostels don’t tend to provide very early breakfasts you can’t leave as early as you might wish to.
Other thoughts:
- Linked to the earlier point about the weather – set out as early as possible to get the best of the weather.
- But make sure you are prepared for rain at any moment.
- Make sure you take enough cash as places don’t tend to accept cards and I didn’t see an ATM.
- Give yourself plenty of time to get back to Latacunga.
- Whilst this is an accessible hike, make sure you are properly prepared with proper equipment. This includes a good set of footwear and I’d also recommend hiking poles, amongst the other essentials.
- Even though it means more ascent overall, we’d recommend walking towards Quilotoa and having it as your final destination rather than the other way round.
Verdict: An accessible and very pleasant multi-day trek. If you enjoy the outdoors and walking in the countryside, then you should try and make room in your schedule for this hike. But if you can, go in the dry season!
